I edited my music video with Adobe Premiere Pro CS5. This is a noticeably older version of the Premiere Pro product, however I chose to use this version instead as to me it is the most efficient, whereas I find that newer versions have streamlined certain aspects a bit too much.

I began my editing by compiling all of the footage that I intended to use together, placing them into a chronological order that would match the storytelling featured in the song that would be playing in the background. In order to do this to the best of my ability, I went ahead and placed the audio file for the song in first, allowing me to match up the scenes with the song in real time. As you can see, the footage continues for a while after the song has already ended, however I have done this deliberately in order to later allow the video to fade out in a more casual manner, as opposed to simply stopping abruptly as soon as the song ends.
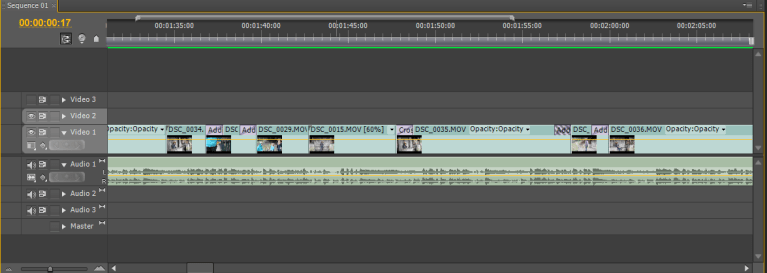
Having placed the footage into the order that made the most sense, I then added numerous transitional effects, particularly additive dissolves and cross dissolves, to certain parts of the video. I used the additive dissolves in order to transition to scenes that are happening at the same time as the footage that had just been shown, without having a rather jarring quick cut, which would naturally disorient and confuse the viewer. As for the cross dissolves, I used these in order to show a time-skip within the story-line, as the song itself also does this at numerous points, and it was only fitting to convey that in the music video as opposed to having all of the events take place in quick succession which would be unlikely to actually happen.
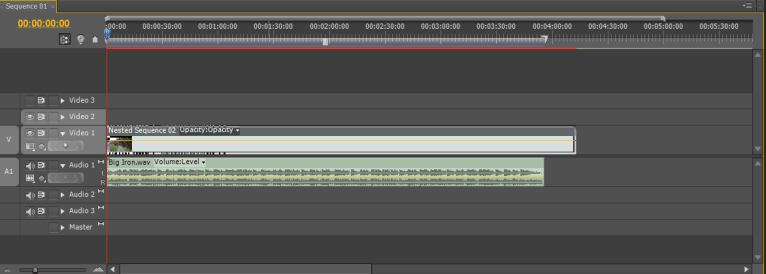
I then nested the whole sequence of clips together into one, as this would be exceptionally helpful when adding the effects later on. This is because if I was to have not nested the sequence, then I would have had to go into each individual clip, of which there are quite a few, and add the effects manually. Using this method, I only need to apply each effect once, and it will be applied to every scene within my music video.
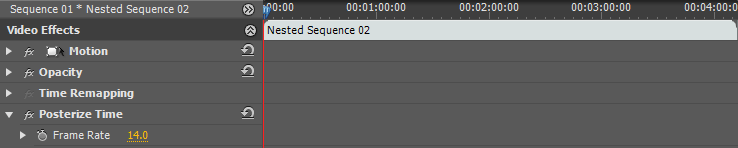
The first effect that I used on my now-nested sequence was the Posterize Time effect. This allows me to adjust the frame rate of my music video to any amount of frames that I would like. I chose to only have a frame rate of 14, as opposed to the standard 24-25 frames per second that the camera initially recorded the footage at. I did this in order to better give off the feeling of the footage being much older than it actually is, as older movies typically consisted of rather rough looking footage, as opposed to the much more smooth look of more recent years.
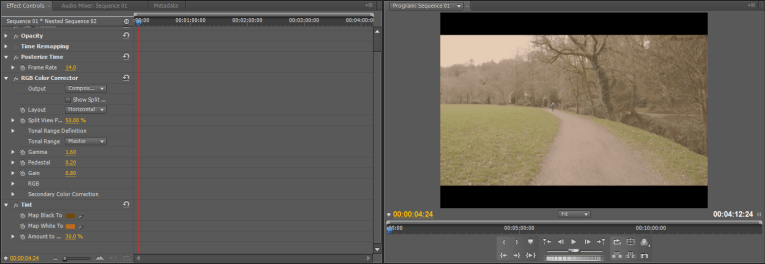
I then proceeded to use the tint effect in order to give the video a sepia colour throughout. I felt as though this would help to further establish a western effect within the video, as western movies are often known for having a rather dry colour palette, consisting of primarily browns and oranges. This would also further establish the older style of film that I am trying to replicate.
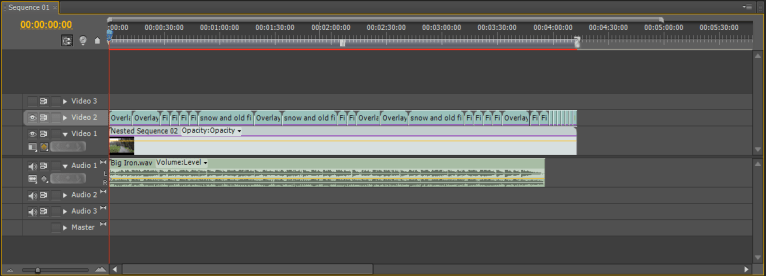
After this, I added multiple overlays on top of the footage that I had already assembled. These overlays consist of various scratches and minor distortions intended to add to the vintage effect that I have been going for. Aiming to make the slightly decrease the quality of the footage, this should also help to make it seem as though the video has been around for a while and suffered from damage during this time.
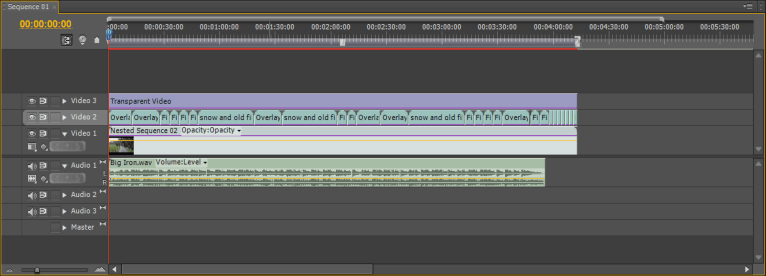
I then decided to add a vignette to the corners of the music video. As there is no way to automatically add a vignette, this was done by first adding a transparent video over the previously existing video layers. I then added a circle onto this video layer, before inverting it and stretching it across the entirety of the footage, making sure that it only affected the corners of the video. This was the final step I took in giving a more vintage effect to my video.
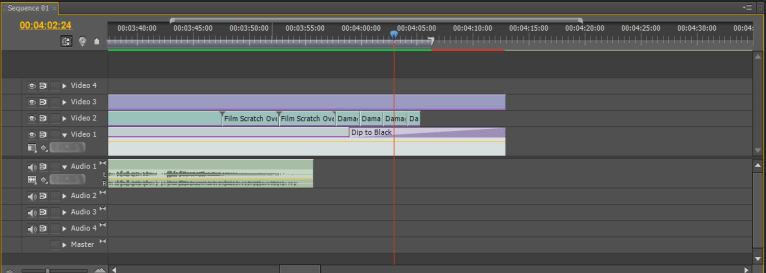
The final piece of editing I did was to add a slow fade out towards the end of the video. As previously mentioned, I did this in order to prevent the music video from abruptly pausing as soon as the song itself ended, as the footage continued for a while after. This way, the video actually comes to a smooth conclusion, hopefully leaving the viewer satisfied.
